Finding out your airbed has a slow leak is one of those frustrating moments you inflate it in the evening, go to sleep, and wake up at two in the morning much closer to the floor than you expected. The good news is most airbed leaks are completely fixable at home, often in under an hour, with minimal tools and no special skills required. A small puncture in vinyl is not a death sentence for your airbed.
The problems tend to happen when people either can’t find the leak or rush the repair and it doesn’t hold. This guide walks through the whole process properly how to actually locate a leak (including the slow ones that are hard to find), how to patch it so it lasts, what to do when the leak is at the valve rather than the surface, and how to patch an airbed when you don’t have a repair kit on hand. Follow the steps in order and you’ll have a properly fixed airbed that holds air reliably.
Understanding why leaks develop in the first place helps you prevent the next one. See How Long Does an Airbed Last with Daily Use? for the daily habits that reduce wear on seams and valves significantly.
Why Do Airbeds Lose Air Overnight?
Before going straight to repair mode, it’s worth understanding what’s actually causing the air loss because not all overnight deflation is a puncture that needs patching.
Common causes of airbed air loss:
- Temperature drop — air contracts as it cools overnight. A mattress inflated in a warm room that cools by several degrees during the night will feel noticeably softer by morning. This is completely normal physics and not a leak
- New mattress stretch — brand new airbeds go through a break-in period where the PVC material stretches slightly under body weight and air pressure. This can require daily top-ups for the first week before the material stabilises
- Valve not fully closed — the valve cap or twist seal not clicked fully into place allows a slow but steady escape of air overnight. Worth checking before anything else
- Actual puncture — a hole in the sleeping surface, side walls, or base of the mattress
- Valve leak — air escaping around or through the valve mechanism itself rather than through the mattress material
- Seam failure — a split or separation along one of the bonded seams, which is harder to repair than a simple puncture
If deflation is gradual and the mattress has only been used a few times, give it a week of top-ups before assuming there’s a leak. If it’s losing a significant amount of air overnight more than an inch of height there’s a real leak that needs finding.
How to Find a Leak in an Airbed?
This is the step most people find most frustrating and the one where a methodical approach pays off more than anything else. Guessing or feeling randomly around the surface rarely works for small leaks.
If the damage happened during storage rather than use, our Best Way to Store an Airbed After Use guide covers the storage mistakes that cause most fold-related leaks.
The soapy water test (most reliable):
- Inflate the airbed fully — more air pressure makes small leaks easier to detect
- Mix a small amount of dish soap with water in a bowl or spray bottle — the solution needs to be soapy enough to form bubbles easily
- Work systematically across the mattress surface in sections — don’t just check where you think the leak might be
- Apply the soapy water generously to each section and watch for bubbles forming. A leak will produce a steady stream of small bubbles at the exact location
- Check the valve area specifically — apply soapy water around the valve base and cap and watch closely
- Check all seam lines — run soapy water along every bonded seam on the sleeping surface, sides, and base
- Mark the leak location immediately when you find it — a piece of tape or a pen mark before you wipe away the soap
The listening method (for larger leaks):
- Inflate fully and hold the mattress close to your ear while pressing gently on different sections
- Larger leaks produce an audible hiss that guides you to the general area before you use soapy water to pinpoint the exact spot
Submerge if possible:
- For small portable airbeds, partially submerging sections in a bathtub shows bubbles rising from any leak immediately
- Not practical for queen or king size mattresses but very effective for compact camping airbeds
Leak Detection Guide:
| Leak Type | Best Detection Method | What You’ll See |
|---|---|---|
| Small surface puncture | Soapy water test | Steady stream of tiny bubbles |
| Larger puncture | Listen first, then soapy water | Audible hiss, then visible bubbles |
| Valve leak | Soapy water around valve | Bubbles forming at valve base or cap |
| Seam leak | Soapy water along seam lines | Bubbles emerging along a seam line |
| Very slow leak | Full inflation + overnight deflation test | Gradual height loss without visible source |
How to Repair an Airbed with a Repair Kit?
Once you’ve found and marked the leak, the repair itself is straightforward but the steps need to be done in the right order. Rushing any part of this, especially the drying time, is why patches fail.
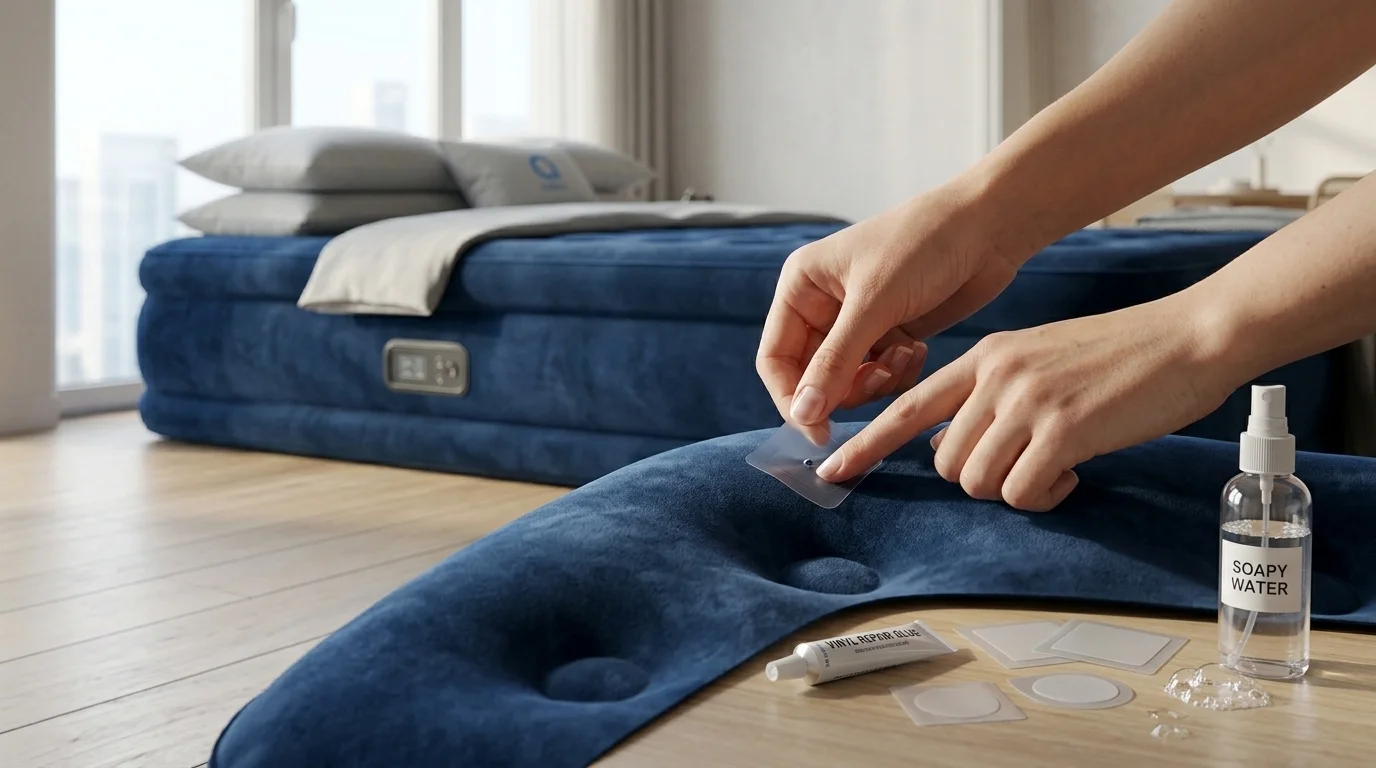
Step-by-step airbed puncture repair:
- Deflate the mattress completely — patching an inflated surface doesn’t work. The air pressure behind the patch prevents proper adhesion. Deflate fully before doing anything else
- Clean the area around the leak — wipe with a dry cloth first, then use a small amount of isopropyl alcohol on a cloth to remove any body oils, dust, or residue from the surface. This step is critical patches don’t bond properly to contaminated vinyl
- Let the area dry completely — allow the cleaned area to dry for at least five minutes. No moisture, no alcohol residue, no nothing
- Cut the patch to size — cut your patch from the repair kit material so it extends at least 2 to 3 centimetres beyond the leak on all sides. Round the corners of the patch — square corners peel away from edges far more easily than rounded ones
- Apply the adhesive — if your kit uses separate adhesive, apply a thin, even layer to both the patch and the mattress surface around the leak. If using a self-adhesive patch, peel the backing and position carefully
- Press firmly and hold — press the patch down with firm, even pressure for at least 60 to 90 seconds. Work from the centre outward to push out any air bubbles
- Leave it completely undisturbed — this is the step people skip. Leave the patch flat and untouched for a minimum of 6 hours. 12 to 24 hours is better for a permanent result. Don’t inflate, don’t test, don’t touch it
- Inflate slowly and test — after curing time, inflate gently to half pressure first and check the patch holds before going to full inflation. Apply soapy water to the patch area to confirm no air is escaping
How to Patch an Airbed Without a Repair Kit?
No repair kit on hand when the leak happens? There are household alternatives that work reasonably well for emergency repairs not permanent solutions, but enough to get through the night while you source proper materials.
Household repair options:
- Duct tape — the most common emergency fix. Clean and dry the area thoroughly, apply a piece of duct tape cut slightly larger than the leak, and press firmly for 30 seconds. This holds for a few nights but eventually peels, especially with body warmth softening the adhesive. It buys time, not a permanent fix
- Waterproof vinyl tape — better than standard duct tape if you have it. Sold in hardware stores, it bonds to PVC better and lasts longer as a temporary measure
- Bicycle inner tube repair kit — often available at home and works on PVC vinyl. Follow the same steps as a proper airbed kit. Not designed for the material but functions adequately for small punctures
- Super glue with fabric patch — a piece of thick fabric secured with super glue can cover a small puncture temporarily. Not ideal but functional in an emergency
For anything beyond a very small puncture, buy a proper airbed repair kit before the next use. Emergency fixes are temporary by nature.
Repairing an Airbed Valve Leak
A valve leak behaves differently from a surface puncture and needs a different approach. If soapy water shows bubbles at the valve rather than elsewhere on the mattress, the valve itself is the problem.
Diagnosing and fixing valve leaks:
- Check the cap first — the valve cap simply not being fully pressed or twisted into the closed position is the most common cause of apparent valve leaks. Check it properly before assuming the valve is damaged
- Check for debris — small particles of dirt or lint sitting in the valve seat prevent a proper seal. Use a thin cloth or cotton swab to clean around and inside the valve opening
- Test if the valve body is cracked — apply soapy water to the entire valve including where it bonds to the mattress material. Bubbles emerging from the junction between valve and mattress indicate the bond has failed
- Valve replacement — some manufacturers sell replacement valve kits. If the valve body itself is cracked or the bond to the mattress has failed, replacement is the right fix. A patch over a valve rarely works well
- Seal around a leaking valve bond — if the valve is sound but air is escaping where it meets the mattress material, a thin bead of waterproof flexible sealant around the valve base can seal that junction effectively
Valve vs Surface Leak Key Differences:
| Leak Location | Signs | Fix Approach |
|---|---|---|
| Surface puncture | Bubbles on flat mattress area | Standard patch repair |
| Valve cap not sealed | Air loss stops when cap is pushed in firmly | Clean and reseat cap properly |
| Debris in valve | Intermittent or position-dependent leak | Clean valve opening and seat |
| Valve bond failure | Bubbles at junction of valve and mattress | Sealant around base or valve replacement |
| Seam separation | Bubbles along a seam line | Seam-specific adhesive or replacement |
How to Make an Airbed Repair Last?
A properly done repair holds as well as the original material. A rushed one peels away within days. The difference is almost entirely in preparation and curing time.
If repeated repairs are becoming a pattern, it may be time to compare your options. Read Airbed or Traditional Mattress Which Should You Choose? for an honest breakdown of when replacing makes more sense than repairing.
What makes airbed patches fail:
- Patching while the mattress is still inflated — air pressure behind the patch prevents bonding
- Not cleaning and drying the surface properly before applying — oils and moisture prevent adhesion
- Cutting the patch too small — not enough overlap means edges catch and peel
- Not allowing full curing time — the most common reason patches fail is testing too soon
- Using square-cornered patches — corners catch and lift; always round them
What makes repairs last:
- Complete deflation before patching
- Thorough cleaning with isopropyl alcohol
- Full dry time after cleaning
- Patch sized generously with rounded corners
- Firm pressure held for 90 seconds during application
- Minimum 12 hours undisturbed curing before use
- Gentle re-inflation to test before full pressure
FAQs
Here are some frequently asked questions given below:
How do you find a slow leak in an airbed?
Inflate fully, apply soapy water systematically across every section of the mattress including all seam lines and the valve area bubbles forming at a specific point identify the exact leak location even when the hole is too small to hear or feel.
Can you repair an airbed without a repair kit?
Yes temporarily duct tape or waterproof vinyl tape applied to a clean, dry surface buys a few nights while you source a proper kit, but these aren’t permanent fixes and will eventually peel, especially with the warmth and movement of regular sleep use.
Why does my airbed patch keep coming off?
The most common causes are patching while the mattress is still inflated, not cleaning and drying the surface properly before applying, cutting the patch too small, or not allowing the full curing time all of which prevent proper adhesion between the patch and vinyl.
How do you fix an airbed valve leak?
First check the valve cap is fully closed and free of debris. If air is escaping around where the valve meets the mattress material, a thin bead of waterproof flexible sealant around the valve base often solves it. A cracked valve body needs full replacement.
How long does an airbed repair last?
A properly done repair clean surface, correct adhesive, generous overlap, rounded corners, full curing time can last for the remaining life of the mattress. Rushed repairs on unclean surfaces with insufficient curing time typically fail within days or weeks.
Conclusion
Repairing a small airbed leak is genuinely a job most people can do themselves in an afternoon, and done properly it’s a permanent fix rather than a temporary patch. The key is not rushing find the leak methodically with soapy water, deflate fully before touching it, clean and dry the surface properly, cut the patch large enough with rounded corners, hold firm pressure during application, and leave it alone for at least 12 hours before testing.
Skip any of those steps and the repair will fail. Follow them and you’ll get a result that holds through months of regular use. A good quality airbed is worth fixing rather than replacing and with the right technique, a small puncture is a minor inconvenience rather than the end of the mattress. Explore Avenli’s range of durable inflatable airbeds and repair accessories at avenli.ca for everything you need to keep your airbed in top condition.